
Work on our fencing project, the bee yard, and the chicken coop continues. We have installed H-braces for our fence corners and gateposts, as you can see above. We also seeded both white and crimson clover to provide a nectar flow for the bees. This will be in addition to flowers we will plant later. Because we live in a heavily wood area, I expect the bees will collect most of the pollen and nectar from the trees.
Installing the H-braces was pretty easy. I measured the distance between the posts and cut the bar to fit. Then I drilled one post, stuck a 10-inch long nail through it and into a hole in the end of the brace. This serves to hold one end of the brace in place while I leveled the post and marked the point to drill on the opposite post. Then we drive another big nail through that post and into the horizontal brace. This looks nice, but doesn’t accomplish anything until you use fencing wire to add some tension to the H structure with some fencing wire and a ratchet.
I watched at least half a dozen YouTube videos on how to do this, including videos sponsored by fence companies and by random homesteaders and farmers. I then proceeded, and it went pretty smoothly. We’re ready to pull fencing, but I’m going to wait until the chicken coop is finished.
Chicken Coop Construction
I spent a good deal of time trying to cut the six posts that will hold up the chicken coop and make sure they are level. This is harder than it sounds because the support posts are on a hill that slopes both towards the left and down in front. Complicating this is our use of a chain saw. It’s very effective at cutting posts, but less effective and doing so with a high degree of accuracy.
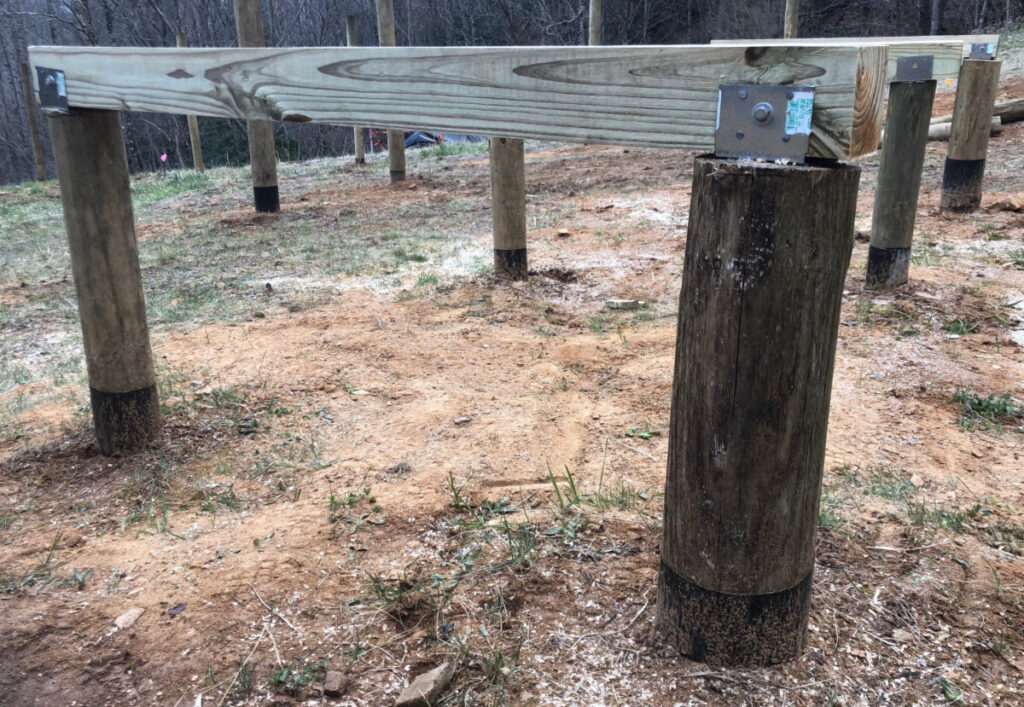
Our first task was to determine how high we wanted the coop. I decided I wanted the coop to be 20 inches off the ground in the right rear post, which is the highest point pf elevation. We then used a line level to mark the other posts (three in front, three in back) and cross checked them by going diagonally. Then I screwed a 2×6 between the posts and used it as a guide for the chain saw. Only one post ended up too tall, and we had to trim it down.
The posts are providing the support for the chicken coop. Running from front to back are three 4x4s, as you can see in the picture, above. These are the beams which will hold up the joists under the chicken coop floor.
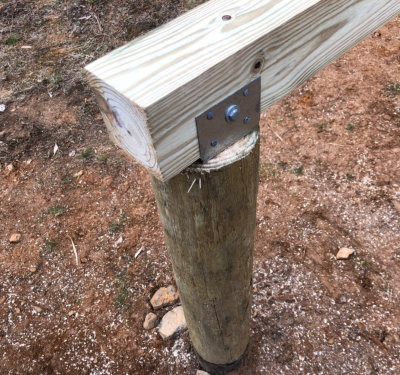
After cutting the posts, I sealed the open tops with a sealant that should help prevent rot. Then I attached a metal bracket to each post using a 3.5-inch lag bolt and a few nails. Then I lagged and nailed the 4x4s into the brackets. Because the lag bolt stuck up, I drilled a 3/4-inch hole in the 4×4 to allow them to lie flat in the bracket. The lag bolt should help hold things in place in a high wind.
Next Steps
Next I have to put together the 2” x6x”12’ joists to which I will attach to the 4x4s and provide support for the floor. We need it warm and dry long enough for the paint to dry, and I’m not sure when to expect that.
After I screw the floor down and paint it to protect the wood, I’ll frame out the walls. If the weather stays wet, I may do this in my garage and then place them on the floor in a separate operation. Of course, I’ll need some siding to put on them. I’m leaning towards T1-11.
Then I have the roof, which is a big step and a major component. I know it is going to be slanted in only one direction, so no ridge beam or roof cap is necessary. I’m using a 4:12 slant to accommodate the snow load. My calculations show that a 6-foot roof will hang over the back 6 inches and the front by 15 inches. I still have to work out specifics of the rafters and how I will attach them to the wall’s top plate. I am thinking of leaving some open areas to screen over to provide ventilation. The roof material is going to be metal and I am leaning towards corrugated steel.
I’m taking this one step at a time. Leveling the posts was a big step. Building the floor is next, but I may jump to the farming if it stays wet. I’ll post more updates in the future.


