We’ve continued to be busy on the homestead, planting, pruning, killing invasive plants, burning yard waste, painting our new bee equipment, inspecting the beehives, harvesting wild strawberries and greens from the garden, and boarding up the garage door.
We did take some time this past week to meet friends an hour away for lunch, and I went shooting with a bunch of guys from church. It was an eclectic bunch, age 12 to 85. About half were natives, about half originally hailed from somewhere else. Good people, good food, and we shot until we ran out of clay pigeons. I had not shot trap or skeet for 20 years, but after the first couple of shots, it came back to me and I broke my share. (My more recent shogun shooting has been with tactical shotgun gun on steel targets.)
The Beretta semi-auto shotgun I bought used back in the 1990s for $300 did just fine, and it is now worth about $800. Just goes to show you that a decent gun will retain its value or even grow more valuable.
Garage Door Delete
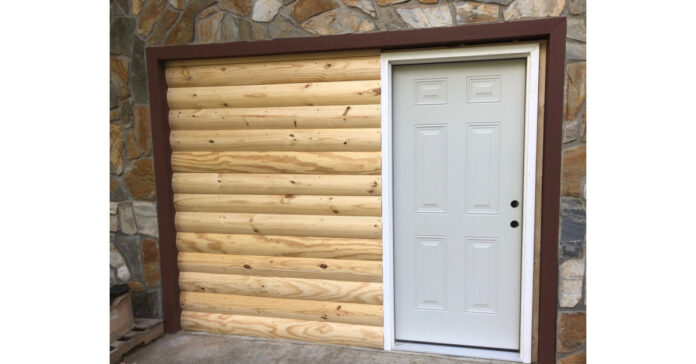
My big project was adding a man-door to our garage. We have a two-door garage, but there is no man-sized door in the garage. This means I have to open the garage door every time I walk the dog or leave the house via the garage, which is where my workshop is, where we store the chicken feed and we keep our bee equipment and gardening supplies. In nice weather, that’s not such a big deal, but in the cold or when the humidity is high, I don’t like to leave the door open for long.
I looked into garage doors that have man doors built into them, but they are expensive. Instead, I decide to put a man-door in front of the garaged door. If you park on both of your garage bays, this approach won’t work, but we use one garage bay for equipment storage, so there’s no need for a 9’x7’ door on that side.
After buying an exterior door at Lowes and some careful measuring, I built the framing and slid it into the garage door. Only, it was so tight it wouldn’t slide into place. I had to knock the bottom off, cut half an inch off each upright piece, and reassemble it. That allowed me to tilt it at an angle and slide it into place. This time it fit! Then I used shims to square it up. I used three-inch nails to screw the framing into the sides of the 2”x12” sides of the doorway and some Tapcon screws to screw the treated lumber bottom board into the cement floor.
Installing the Door
The exterior door slid right in. At least I had measured that space correctly! It was almost perfectly level and square, so only one shim was required. I secured it to the double thickness of 2x4s on each side, making very sturdy.
On Day 2, I installed a vapor barrier on the exterior and cut the pine log siding to fit. I attempted to nail it into place like I would tongue-and-groove flooring, but even using small nails caused the wood lip to split. I gave up on hiding the nails and put screws in the thick part of the siding. The siding is not going anywhere!
The leftover siding scraps will make great kindling. I’m going to run them through the table saw to make them about an inch wide.
The last thing I did was to install the lockset so the door can open and close and added some trim around the inside of the door.
Next Steps
I still need to add some insulation to the wall and finish the interior. I am tempted to use inexpensive T1-11 or another plywood which will then allow me to mount shelves or hangers directly to the wall. It is, after all, a work space.
I also need to stain the exterior log siding to match the house and then paint the door and trim. That’s next week’s project, assuming the rain holds off.
The new door initially confused the dog, who would wait for me to open the garage door, but I love it. The new man-door is faster, doesn’t require electricity to open, and a big gust of exterior air doesn’t go in or out of the garage every time we open the door. I’d estimate I go in or out at least 10 times a day, probably 20 times on a busy day, so the savings add up.
Best of all, the original garage door is still there, inside the new door. We can even open and close it, although there is little point in doing so. If the next owner of the house wants to park two cars in the garage, removing a few dozen screws will allow removal of the door and siding as a unit, making that possible.
More Firewood
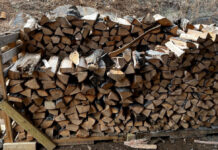
I received another delivery of firewood. This means we now have more wood than we did going into last winter. I feel good about that. My supplier said, “You’re smart to get it early.” They may sell out this winter as people burn wood to combat the high cost of home heating oil and propane. Of course, they can always cut more wood, but it won’t be dry in time to burn this winter.
That’s another reason I like to buy my wood early, because I know how long it has been drying. I have woodpiles from December, January, February, April, May and now June. I’ll burn them in that order, meaning my wood will have dried at least 10 months when I use it. My hope is that this latest pile won’t need to be burned until the 2023/24 winter. All my woodpiles are open to the sun and wind, which speed drying. In late August, I’ll cover the first two we plan to use with a tarp that hangs a couple of feet over the sides, just to ensure that wood stays dry when it rains or snows. When I use up one pile, I’ll cover another, so I always have at least two dry piles.
Don’t Burn Green Wood
When you put green or damp wood on the fire, moisture appears on the end of the logs and steam comes out. (Don’t be fooled thinking this is smoke! If it discolors the wood, it’s steam.) Steam is not what you want in your fire box. If your fire is hot enough, green wood will burn, but it doesn’t produce as hot a fire and causes far more creosote buildup in your chimney.
Do you heat with wood? If so, sock up now. If you don’t normally heat with wood but you can, buy a cord or two. You may need it this year if the utilities go out or if there are shortages and prices get too crazy. If not, you can store it for three to five years if you keep it off the ground. I stack all my firewood on pallets.


