Our long weekend with the young woman who wanted some experience homesteading is over, and it went well. We are all exhausted, which is a good lesson for someone who wants to homestead: It ain’t easy. While we harvested garden plants, we never did get to pick up a shovel or stack firewood. Still, she left satisfied.
This young woman wasn’t against hard work, which is good to see and may make her an aberration in that generation. She also had a fair amount of book learning, but it wasn’t always practical or correct. Some things are easier learned through experience than by reading or watching videos.
That’s an important lesson for future preppers as well as homesteaders: practice with your gear, use your equipment, and find out what works best for you, not someone else. Your situation, strength, coordination, location, weather or some other factor could cause a different outcome than you might expect from your research. Do a trial run before your life depends on it.
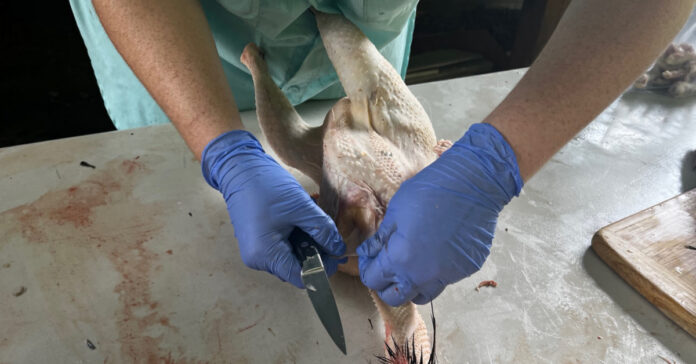
For example, she held a knife differently than I did and tended to stab with it. I kept telling her to slice; you don’t cut with the point. Slicing a chicken’s neck to bleed it out was easier when using my technique. Since the big test during her visit was butchering chickens, that will be today’s topic.
It’s Still Difficult
I had butchered chickens only once before, so I am not an ideal person to give lessons, but I was there and I had chickens ready for butchering. The test here was 1) can she bring herself to kill and chicken, and 2) can she slice and tear into the body to remove the guts. She passed the test. She could do both, but it was time consuming.
The night before, we watched a few videos, including what I consider to be one of the best instructional videos on chicken processing featuring Joel Salatin of Polyface Farms (who is like a guru for many homesteaders). There was even one instance during our butchering that we pulled up the video on a phone and watched how he cut around the anus.
What Went Well
Last time I processed a chicken, I had to do so when my wife wasn’t home because she didn’t want to hear it, watch it, or help with it. Catching an ornery rooster is difficult with one person, so I shot it in the head with a .22. We learned it is far easier to catch a rooster with two people, although she did get attacked and survived with only a minor cut to her hand and a few bruises on the legs. If you had seen the spurs on these roosters, you’d know she got off lightly.
Once again, plucking the chicken proved to be pretty easy as long as you dunk them in 150 degree water for a minute to 90 seconds. Most of the feathers then pull out in big handfuls.
Gutting the chicken, for lack of a better term, also got easier with experience. By the third bird, she was better able to loosen the crop and pull out the esophagus, for example.
We used the killing cone on the first two birds and slit their throats. After that, we went with the old-fashioned hatchet and then held the chicken up as the blood drained into a bucket. I know the killing cones are currently the preferred method, but we liked the hatchet. I also learned to have some water in the bucket. It makes clean up afterwards much easier.
More hands are also beneficial. If I can avoid it, I won’t process them alone again.
What Didn’t go so Well
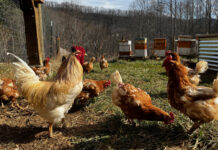
Most of the videos are on processing meat birds, which are large, fast-growing birds processed at eight or nine weeks old. They have lived a cushy life with little exercise. We were processing two-year-old Speckled Sussex and the smaller Red Stars that are outside all day and free range most days. Their life is not as cushy, and the toughness of their skin and connective tissue showed it. Skin that was easily torn open on young birds on video was difficult for even me to stretch or tear. We ended up using the knife far more often than the YouTube homesteaders.
In the videos, people are also processing an entire bird for roasting, and the finished product looks like you would find at the grocery store or on a rotisserie spit. I think it is far easier to take the plucked bird and remove the parts. First, we have some recipes that call for chicken breast and some that call for legs and thighs. By quartering the chicken, you can pack the light and dark meat separately for freezing. More importantly, you don’t have to worry as much about gutting the bird. Just peel off the parts of meat you want. Granted, you may lose a few ounces of meat this way, but you save in time and effort. Since I’m not getting paid by the pound, I’d go with the quartering approach.
Thoughts on Raising Meat Birds
I like chicken, but prices will have to rise substantially before I decide to raise meat birds for personal consumption. I’m willing to butcher and eat my older birds, but it is to time consuming with too little payout to be something I want to do every couple of months.
The good news is that processing chickens requires minimal equipment and anyone can do it. I use the same 32-quart pot and propane burner to prep the chickens for plucking that I use to heat and mix my sugar syrup to feed the bees. We use the same folding table for several uses on the homestead. The coolers we used to bring food home from Sam’s Club were filled with ice water to chill the chickens after processing. The knife that worked best was the one that I use to filet fish. (Just wash things well when you are done—real well.) While you can buy specialty chicken processing equipment for your homestead, you don’t have to, certainly not for just a dozen birds a year.
That might be different if I raised chickens as an income stream. In that case, I want to be as efficient as possible and specialized equipment would help.
I’m focused on honey and eggs as money makers instead of chicken meat. I’ll talk about our big honey harvest later this week.

