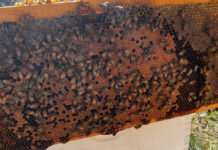
I have had the supplies on hand to install the electric fence for months, but I was always busy working on something else. We had the welded wire fence and two gates, so I wasn’t in a big hurry to complete it. I set a goal to the electric fence up and running by September 1 to prevent any bears that might find my beehives a tasty treat before hibernation.
Bears can destroy beehives. While cartoons and storybooks have led us to believe that bear like honey, they also eat brood, or the eggs, larva and pupae of bees which provide protein.
Let’s just say I missed the goal by a long shot.
The Best Laid Plans
I had it all planned out in my head. The fence charger would go on this fence post, the ground would go there, and the lines would run this way. Until there proved to be no dirt free enough of rocks to accept an 8-foot ground rod. I tried fifteen places and the most I ever got was two feet deep before I hit a rock. I kept pounding, but all it did was bend the rod. Then I had to pull it out, and try again. And again.
Eventually, the ground rod sank into the ground. After taking 160 strokes with the fence post driver to push the post in two feet, this one sunk seven-and-a-half feet in less than 80 strokes. Of course, my work was not done. They recommend two ground rods ten feet apart. It ended up being twelve, but I was happy to settle for that.
Now I just had to re-route the fence, figure out the best way to run the wires. That was pretty easy.
Insulators
I had purchased plastic insulators designed to be hammered into the post. Now I just had to determine the best height at which to sting my wires. There are plenty of guides online. Some for deer, some for bears, some for small predators. My fence surrounds the garden, the chickens, and the bees, so I needed to stop all the above, plus any coyotes, stray dogs or other creatures in the mood for a chicken dinner.
I came up with a scheme that had a line at five inches above ground level, 11 inches, 19 inches, 30 inches and 42 inches. The idea was to have a line at nose height for everything from a rabbit to a deer or bear.

I measured out the various line heights on a piece of scrap wood and carried it with me around the garden. I used a sharpie to make a set of corresponding marks on every post. Then I carried a bucket full of insulators around and hammered them into 10 posts. Then I had to buy more, which took a few days.
Stringing Wire
I strung up a short run of 14-gauge galvanized steel wire from the charger to the gate and found that it is difficult to put tension on electric fencing wire. I quickly learned that I could not use the plastic insulators as termination points for the wire because they were too flimsy. As I tightened the wire, it crushed the insulators. I pulled out the plastic insulators and screwed in some ceramic insulators I had on hand. The ceramic models were stronger and worked much better. The fence was working–for a run of about 24 feet.
Now I had to pull almost 200 feet of wire around the fence posts and chicken coop, inserting a black plastic tube to act as an insulator for every corner post. Turns out, this is not a one-man job. Once again, my wife had to be my helper.
I anchored one end of the wire and walked around the fence, unwinding wire from the heavy spool of wire, as she slid it into the insulators. When we reached the other end, I cut about six feet of extra wire and anchored it to the other end. Then we cut the wire in the middle and we slide the plastic insulator tubes on and pulled them to each corner. I used a fencing staple to keep them from slipping down or rising up, but didn’t hammer it all the way in. This would allow the wire and the insulated to pull to the left or right as needed. Then I installed a fencing ratchet where the two cut ends were and used the ratchet driver to tighten it up.
Cranking the Ratchet
When I had last used the ratchet, I was using a much heavier gauge of wire. When it creaked and popped, I knew it would not break. The 14-gauge wire seemed so much thinner. I actually worried as I cranked it, thinking it might snap somewhere along the line.
It didn’t, and the fence pulled nice and tight. Any waves left from the turns around the spool disappeared. It looked good! I was feeling like I knew what I was doing.
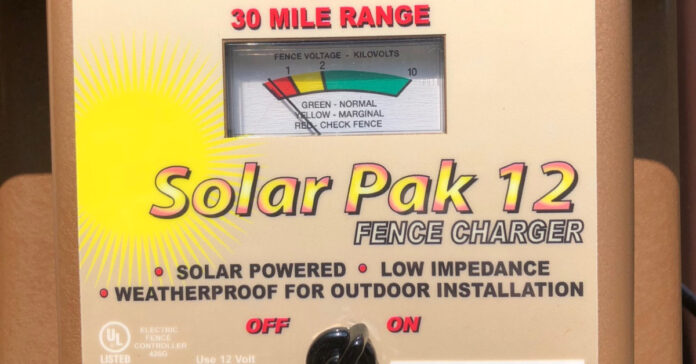
Then I turned on the charger and the needle bounced around before setting in the red. “Check Fence” it said. Apparently, my wire was grounding out somewhere. We walked around the fence, and oh boy was it!
First, there was a corner where the insulation should have been much longer. We had to unspool the ratchet, thread some more insulator on, and tighten the fence back up.
Second, there were several places where the taut electric fence wire would touch the welded wire beneath it. There was no easy fix for this problem.
My Mistakes
Admittedly, this was my first electric fence, and I was learning my trial and error. I figure I made several mistakes:
My biggest mistake was to put the electric fence and the welded wire fence on the same side of the wooden fence posts. I think I would have been better off to have the welded wire on one side of the post and the electric fence on the other. Alternatively, I could have installed a second fence, just for the electric wire, and set them about eight inches apart. Either of these options would have solved the problem.
I think what may have happened is that the welded wire fence, which I pulled tight and installed back in June, may have stretched a bit. It was no longer as taught, and in some of the longer runs, it now flexed enough to cover the 1.5 inches of offset provided by the plastic insulator. When my electric fence wire touched the welded wire fence, it grounded out.
Another mistake was using the short plastic insulators that they sell in all the local stores. These are cheap, about $6 for 25. Sounded like a bargain, until they failed to do the job. I needed insulators that provided four to six inches of space.
If you want to point out any other mistakes or make suggestions, feel free to leave a comments, below.
Next Steps
I’m planning to head to tractor supply later this week and pick up some bigger, better insulators. If that fails to work out, I’ll be getting some T-posts to put in between our current fence posts to keep the welded wire fence from pushing forward and touching the electric wire.
If I ever had an outyard, an apiary on another property, I going to go with T-posts and braided poly wire only, with two or three strands. That will be simpler, faster, and less expensive.

